The basics of editing a video includes adjusting the opening of your video, trimming outtakes and adding chapter points. By the end of this lesson you will have the skills to quickly edit a video presentation
First:
Editing a video requires more rights to edit the lecture.
First request access via the contact form.NOTE: It is only possible for a course manager to contact Collegerama to edit the videos and to whom access must be granted
Login to my Weblecuture(s) for editing
- Login with your TU Delft netID
https://collegerama.tudelft.nl/mediasite/mymediasite
Online Documentation Editor Supplier
1) Select a video for editing
1.1. Click: Shared Folders
1.2. Select a recording for editing

2) Click on “Edit Video”

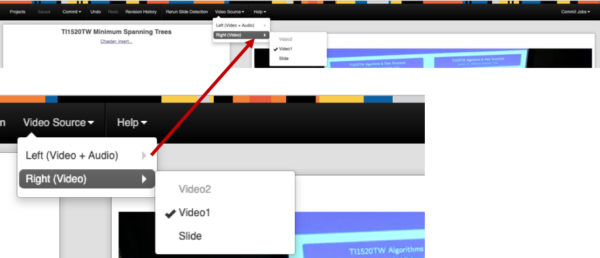
3) Select video Source for enable Camera and Presentation/smartboard
3.1 Left (video + audio): Video 1 (Camera)
3.2 Right (video): Video 2 (Presentation) or Video 3 (Smartboard)

4) Editten Video
Actuel Online Documentation Editor Supplier
5) Commit change…
Commit to current:
This option is similar to using Save in a document. When you commit to current it will override the existing presentation and apply all edits.
Commit to New:
This option is similar to using Save As. You will be prompted to give the file a new name. In My Medasite a new presentation will be created with the edits while the original will remain.
Commit to Existing: (ONLY FOR ADMINISTRATORS)
This is a unique feature that allows you to save the edited presentation to one that already exists in My Mediasite. Most often you will use this when a blank presentation was created as a placeholder for the final edited version.

